

The short version
Poka-yoke — mistake-proofing — is the practice of designing a process so the error is hard to make and impossible to pass on. On a manufacturing line that means physical devices: a fixture that only accepts the part one way, a sensor that counts the screws before the line releases the unit, a light that fires the moment a step is skipped. This guide is built around real shop-floor examples — the three classic device types (contact, fixed-value, motion-step), where each one earns its keep, and a worked station example — plus the method to find your highest-leverage error and proof it this week. The aim isn't to catch defects at final inspection; it's to make them at the source impossible, or at least immediately obvious.
Why poka-yoke is different in manufacturing
Most quality writing treats mistakes as a training problem: write a better work instruction, retrain the operator, post a reminder. On a line running thousands of cycles a shift, that approach quietly fails — not because people are careless, but because attention is a finite resource and a momentary lapse is a statistical certainty. Manufacturing is where poka-yoke stops being a slogan and becomes hardware:
- The same error repeats thousands of times a day. A connector that can be inserted backwards eventually will be — not once, but at whatever rate human attention slips. You can't train your way under that rate; you have to remove the possibility. This is the heart of jidoka: build quality into the process so a defect can't move downstream.
- A defect that escapes the station gets exponentially more expensive. Caught at the station, a wrong part is a five-second swap. Caught at final test, it's a teardown. Caught at the customer, it's a recall. Poka-yoke pays for itself by catching the error at the cheapest possible moment — the instant it's made.
- Inspection is itself unreliable. Asking someone to eyeball every unit for a missing clip is slow, boring, and never catches everything — visual checks miss defects at a rate that climbs the faster and more monotonous the work gets. A device that physically blocks the next step doesn't get tired or distracted. You're replacing human vigilance with a mechanism.
- The fix lives in the standard work, not the memo. A real poka-yoke changes what the process allows, so the right way becomes the only way. That's why it survives the next shift, the new hire, and the supervisor who isn't watching.
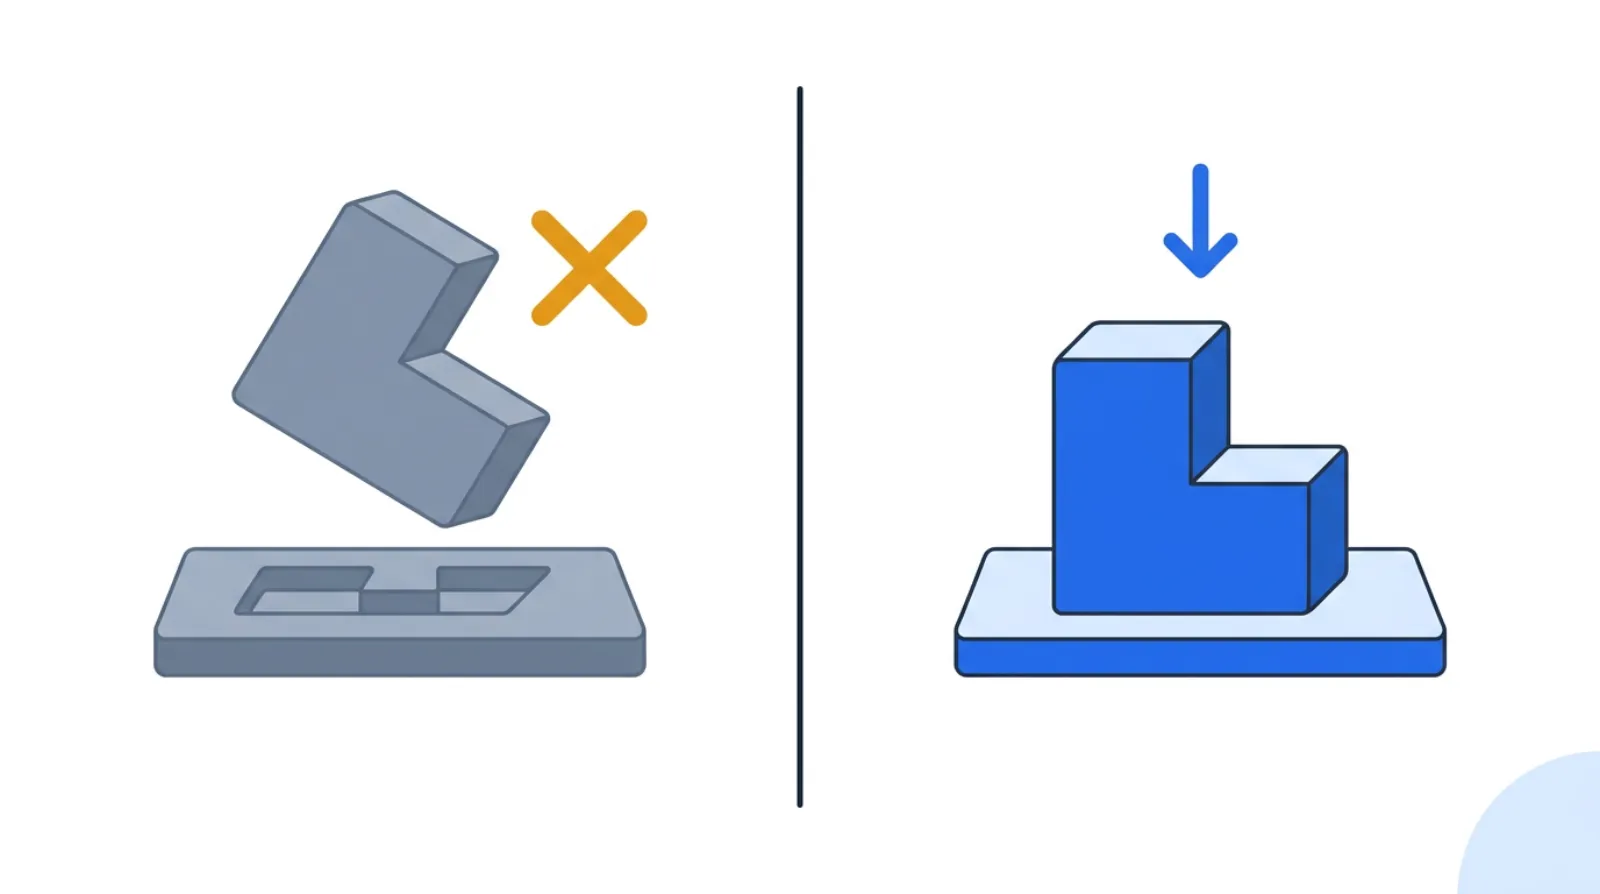 A good poka-yoke makes the wrong action physically impossible and the right one effortless.
The one-line test for any poka-yoke: can the operator make — or pass on — this specific error if they wanted to? If the honest answer is "yes, if they're not paying attention," you have a reminder, not a mistake-proof. Real poka-yoke removes the choice.
So the goal isn't zero human error — that's impossible. Borrowing the Toyota lens: efficiency is the consequence, not the goal. You design the work so the defect can't form or can't escape, and lower cost, faster flow, and a calmer line follow — because nobody is reworking, sorting, or apologizing for the same mistake twice.
The three poka-yoke device types, translated for the line
Shigeo Shingo, who formalized poka-yoke at Toyota, sorted mistake-proofing devices into three functions. On the floor they map to three different questions about a step. Learn to recognize which one a given error needs and you'll stop reaching for a sign when you need a sensor.
1Contact methods — Poka-yoke by physical shape: the part can only go one way
A contact device uses geometry — a pin, a notch, an asymmetric edge — so the part physically fits only in the correct orientation or only the correct part fits at all. The classic example: a fixture with a locating pin offset from center, so a symmetrical-looking bracket can't be seated backwards. Or a connector keyed so the mating half won't engage upside down.
This is the strongest form of mistake-proofing because it prevents the error rather than detecting it — there is no defective unit to scrap, because the wrong action never completes. Reach for contact methods first whenever the error is about orientation or wrong part: asymmetric fixtures, keyed connectors, different-diameter pins for similar bolts, a chute that only passes the correct size.
2Fixed-value methods — count the actions: nothing leaves short
A fixed-value device confirms a fixed number of actions happened before the unit can advance. If a step requires eight screws, you don't trust the operator to count to eight under time pressure — you kit exactly eight screws per unit so a leftover screw is an unmistakable signal, or you use a nut-runner that won't give the "complete" signal until it logs eight torque events.
Fixed-value is the answer when the error is omission: a missing fastener, a skipped weld, one of four clips left off. Kitting to exact count, parts trays with one well per component, and torque-counting tools all turn "did I do all of them?" from a memory task into a physical fact.
3Motion-step methods — enforce the sequence: no skipping, no out-of-order
A motion-step (or sequence) device confirms each step happens, in order, before the next is allowed. A common version: a light curtain or limit switch at each bin in a build sequence, wired so the unit won't release until bins 1-2-3-4 were each triggered in turn. Skip bin 3 and the line holds.
Use motion-step methods when the error is sequence or skipped step — especially for steps that disappear into a later operation (apply sealant before the cover goes on; you can't see a missing bead once it's closed). These devices often tie straight into jidoka: the moment the sequence breaks, the station stops or signals rather than passing a suspect unit along.
A fourth dimension: warn vs. control
Cutting across all three types is one design decision that matters more than which type you pick: does the device control (stop the process — the unit physically cannot advance) or merely warn (a light or buzzer fires, but the line keeps moving)?
- Control is always stronger. A fixture that won't close on a backwards part, a line that halts on a skipped step — the defect cannot propagate. Default to control whenever stopping is safe and the cost of a false stop is low.
- Warn is the fallback when stopping the line is dangerous or wildly expensive, and you accept that a distracted operator might override the signal. Pair a warning with an andon — the line-side signal (a light, a sound) that calls for help the moment something's wrong — so the alert is loud, visible, and escalates if ignored. A warning nobody notices is no poka-yoke at all.
When you sketch a device, decide control or warn on purpose. Drifting into a warning because control was harder to build is how a "poka-yoke" ends up letting defects through anyway.
How to mistake-proof your first error (step-by-step)
Pick one error on one station — the defect your line actually argues about — not a plant-wide program. Mistake-proofing is a series of small, cheap devices, not one big project.
- Go to the gemba — the actual place the work happens — and watch the error happen. Don't proof the error you imagine; proof the one the line makes. Stand at the station, watch real cycles, and ask the operators where it goes wrong and where they almost go wrong.
- Find the real cause, not the moment. Run a quick 5 Whys or a fishbone on the defect. "Operator inserted it backwards" is the symptom; "the bracket is symmetrical so backwards looks right" is the cause you can actually proof. Aim the device at the cause.
- Pick the type — prevent before detect. Orientation or wrong part → contact (geometry). Missing count → fixed-value. Skipped or out-of-order step → motion-step. Always prefer a device that prevents the error over one that only detects it after the fact.
- Decide control vs. warn. Can you safely stop the unit from advancing? Default to control. If not, build a loud, escalating warning tied to an andon.
- Build the cheapest version that works, and try to break it. A whittled wooden locating block proves the concept before you machine a steel fixture. Then have someone actively try to defeat it — insert the part wrong, skip the step. If they can, it's not done.
- Fold it into standard work and watch the metric. Update the work instruction so the device is the method, and track first-pass yield on that defect. The device should drive the escape rate toward zero; if it doesn't, your cause was wrong — go back to step 2.
A worked example: a wiring-harness connector station
To make the moves concrete, here's how they'd play out on a single station. The numbers are an honest hypothetical — the moves are the ones you'd actually make.
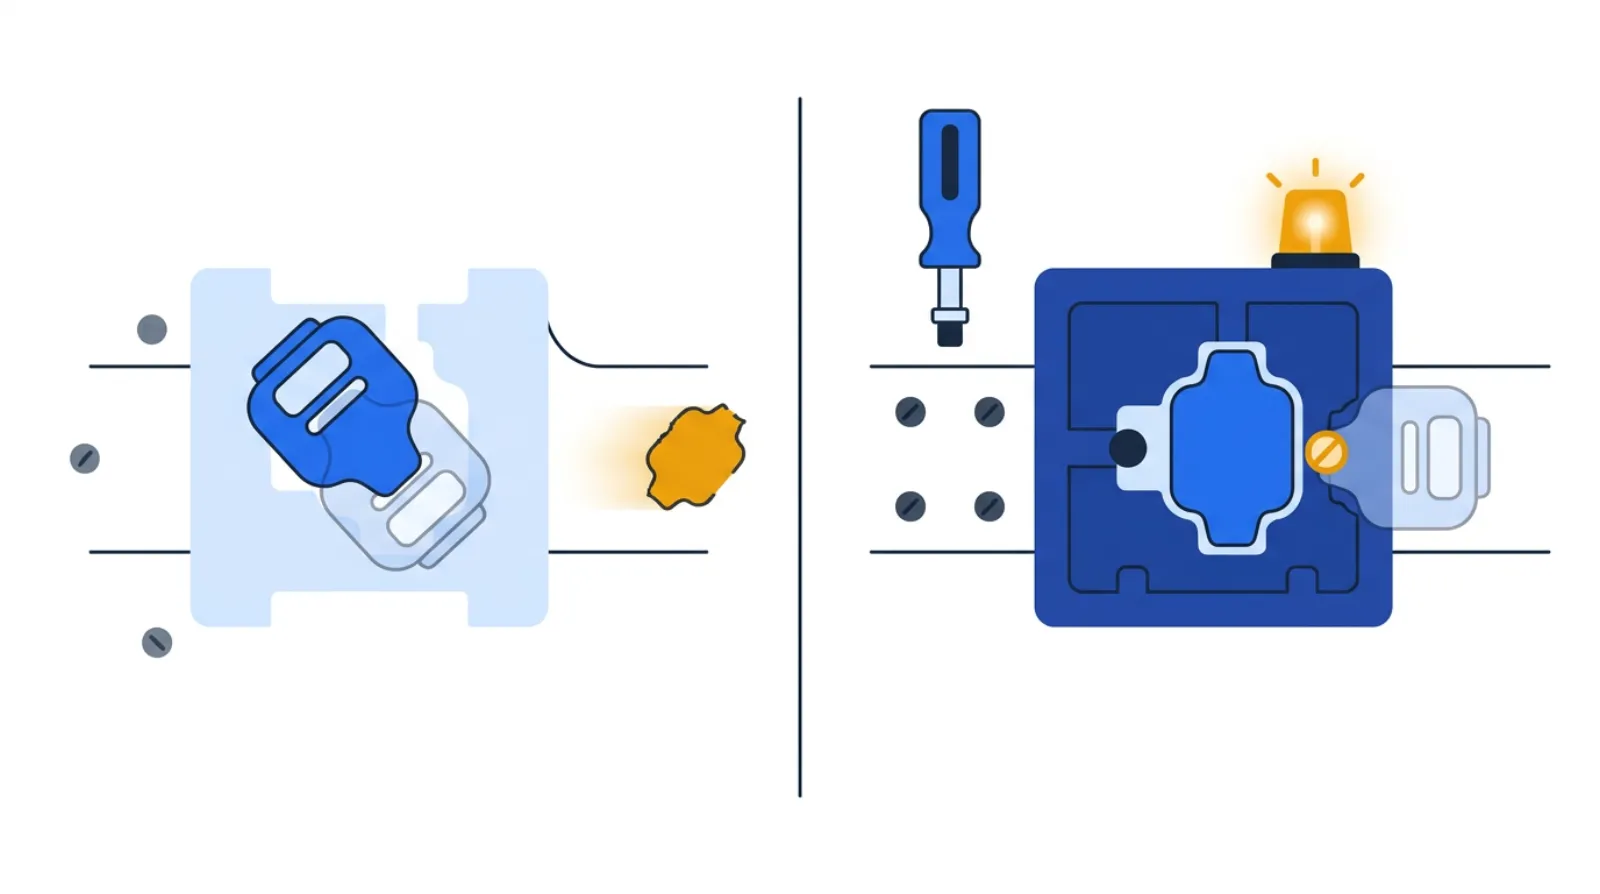
Say a station seats a connector and drives four retaining screws. Two errors recur: the connector occasionally goes in rotated 180° (it looks nearly symmetrical), and now and then a unit leaves with three screws instead of four. Today both escape to final test, where they're an expensive teardown. You walk the station, run a quick root-cause analysis, and design a device for each error:
| Error | Real cause | Device type | Control or warn |
|---|---|---|---|
| Connector inserted 180° backwards | Body is nearly symmetrical — backwards looks right | Contact (keyed locating pin, off-center) | Control — fixture won't seat it backwards |
| One of four screws missing | Operator counts under time pressure | Fixed-value (nut-runner logs 4 torque events) | Control — "done" signal withheld until 4th |
| Either fault reaches final test | No signal at the station itself | Motion-step + andon | Warn — light + escalation if overridden |
The connector fix is pure prevention: with an off-center locating pin, the backwards orientation physically won't seat, so there's no defective unit to catch — the error simply can't complete. The screw fix is detection at the source: the nut-runner withholds the station's "complete" signal until it logs the fourth torque event, so a three-screw unit can't advance. Neither device asks the operator to be more careful; both change what the station allows.
Notice what you did not do: you didn't add a final-test inspector, and you didn't write a reminder. You moved the catch from the most expensive moment (final test) to the cheapest (the instant of the error), and you replaced human vigilance with geometry and a sensor. That's the whole game — and it's a textbook kaizen: a small, cheap, reversible change aimed at one well-understood cause.
A simple poka-yoke health check
You don't audit the whole plant every week. Walk one line and answer five questions — keep it to a page so it actually gets used:
- Escape map: Do you know your top three recurring defects, and which station each is born at?
- Prevent vs. detect: For each, is the device preventing the error (geometry) or only detecting it — and could you push it upstream toward prevention?
- Control vs. warn: Are your critical poka-yokes control devices (the unit can't advance), or warnings an operator can override?
- Defeat test: When did someone last actively try to beat each device? A poka-yoke nobody has attacked is untested.
- In the standard: Is each device written into standard work and reflected in visual management at the station — or living only in one operator's habit?
Use a 5S pass on the station to expose the conditions that breed errors — look-alike parts mixed in one bin, no fixed home for the right component — before you build the device. Half of mistake-proofing is removing the ambiguity that causes the mistake in the first place.
Common manufacturing poka-yoke mistakes
- Confusing a sign for a poka-yoke. A laminated reminder taped to the station is a hope, not a mistake-proof. If a distracted operator can still make the error, it isn't proofed. Real poka-yoke removes the choice.
- Detecting when you could prevent. A sensor that scraps a backwards part is good; a fixture that won't accept it backwards is better — there's nothing to scrap. Always push toward prevention.
- Building the steel version first. Over-engineering a device before the cheap prototype proves the concept wastes money and slows learning. Whittle it, test it, then harden it.
- Never trying to defeat it. If no one has actively tried to beat the device, you don't know it works. Adversarial testing is part of the build.
- Proofing the symptom, not the cause. "Operator skipped the weld" leads to a useless reminder; "the weld is invisible once the cover's on" leads to a motion-step interlock. Aim the device at the cause you found with 5 Whys.
- Letting alarms become wallpaper. A warning device that fires constantly gets ignored. Tie warnings to a real andon response, and fix the noise so the signal stays meaningful.
Templates & tools
- Free 5S audit tool — mistake-proofing starts with a station where the right part has a fixed home and look-alikes are separated. Use the 5S audit to remove the ambiguity that breeds errors before you build a device. No login required.
- Fishbone diagram and 5 Whys — find the real cause of the defect so you proof the cause, not the symptom.
- Related guides: How to Use Takt Time in Manufacturing — takt is the pace the line must hit to meet demand, and that time pressure is what drives omission errors — and How to Build a Fishbone Diagram in Manufacturing for the root-cause work that should precede every device.
FAQ
What is poka-yoke in manufacturing? Poka-yoke is mistake-proofing: designing a process or device so a specific error is either impossible to make or impossible to pass downstream. On a line it shows up as physical devices — keyed fixtures, counting sensors, sequence interlocks — rather than reminders or extra inspection. The goal is to catch (or prevent) the error at the instant it would happen, where it's cheapest to fix.
What are the three types of poka-yoke devices? Contact methods use shape and geometry so the part fits only one way or only the correct part fits (preventing the error). Fixed-value methods confirm a set number of actions happened — eight screws, four welds — catching omissions. Motion-step (sequence) methods confirm each step happens in the right order, catching skipped or out-of-order steps. Contact is strongest because it prevents rather than detects.
What's the difference between poka-yoke and inspection? Inspection checks the unit after it's built and depends on human attention, which always misses some share of defects — and misses more as the work gets faster and more repetitive. Poka-yoke is built into the process so the defect can't form or can't advance, and a device never fatigues. Poka-yoke replaces vigilance with a mechanism; inspection relies on it.
What's the difference between a control and a warning poka-yoke? A control device stops the process — the unit physically cannot advance until the error is corrected. A warning device only signals (a light or buzzer) and lets the line keep moving, so an operator can override it. Control is always stronger; use a warning only when stopping is unsafe or too costly, and tie it to an andon so it can't be quietly ignored.
How is poka-yoke related to jidoka? Jidoka is the broader principle of building quality into the process so defects don't move downstream — often by giving a machine or station the ability to stop itself when something's wrong. Poka-yoke is the concrete mechanism that does it: the device that prevents the error outright, or detects it and triggers the stop or signal. Poka-yoke is how jidoka shows up at the individual station.
Where should I start with mistake-proofing? Start with your single most expensive recurring defect — the one that escapes to final test or the customer — at the one station where it's born. Watch it at the gemba, find the real cause, build the cheapest device that prevents it, and try to defeat it. One proofed error beats a plant-wide program that never ships a device.
Related concepts & guides
- Dictionary: Poka-Yoke · Jidoka · Andon · Standard Work · Visual Management · Root-Cause Analysis · 5 Whys · First-Pass Yield · Muda
- Guides: How to Use Takt Time in Manufacturing · How to Build a Fishbone Diagram in Manufacturing
Sources
- Lean Enterprise Institute, Lean Lexicon: Mistake-Proofing (Poka-Yoke)
- Shingo, S., Zero Quality Control: Source Inspection and the Poka-Yoke System (Productivity Press)
Related concepts
Founder of Kaizumi, an AI-powered Lean training platform. More about Matt →
Drafted with AI assistance and reviewed by Matt Savas for accuracy.